Add a New Calendar
1. Click on this link: Add New Calendar
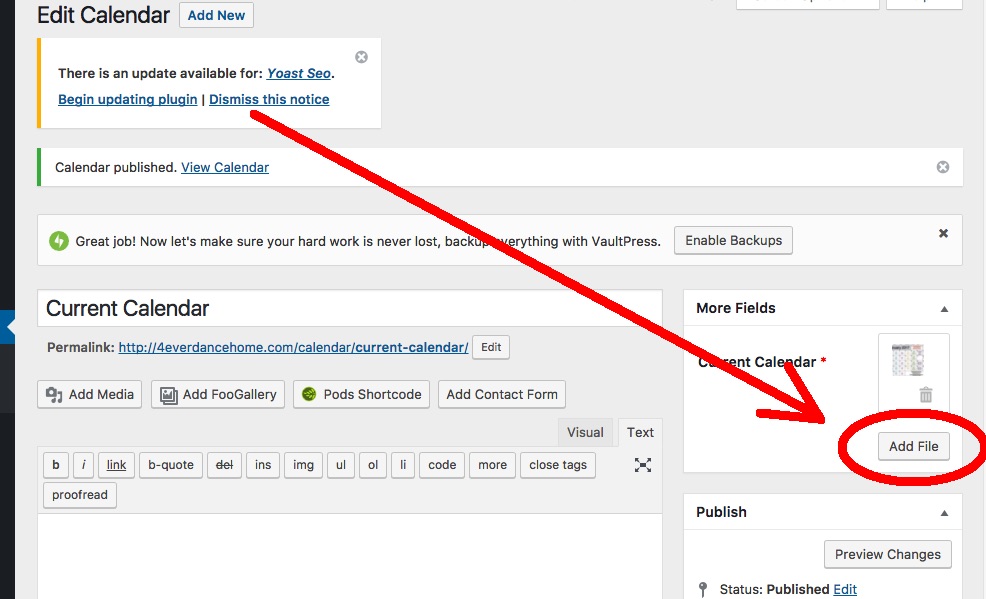
2. In the “Current Calendar” box on the right, click “Add File”:
3. If you don’t see a big white space, click “Upload Files:”

4. A big white space with the text “Drop files anywhere to upload” appears:
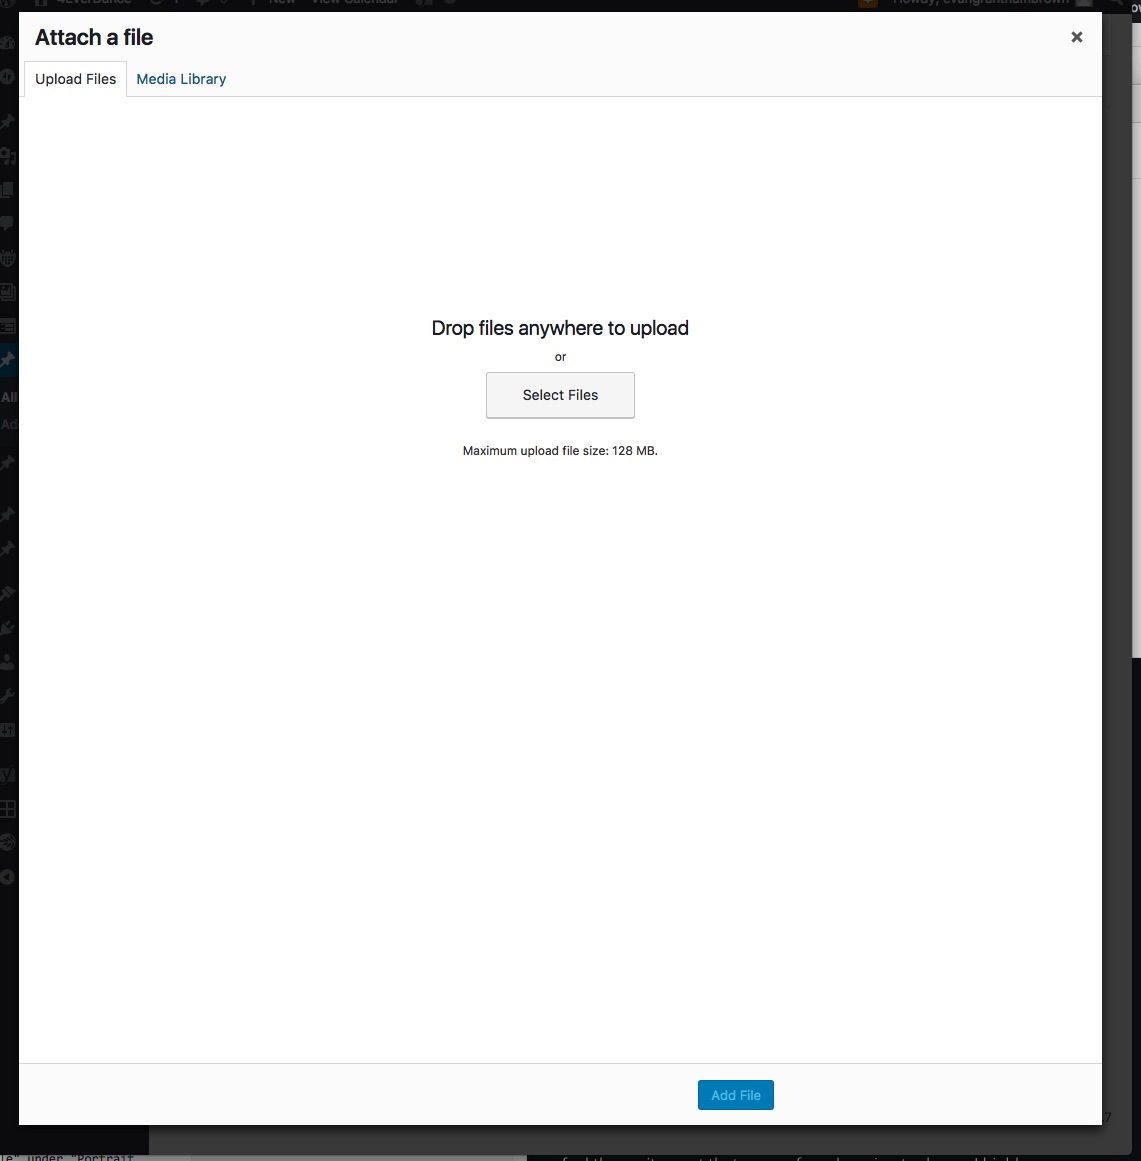
Find the calendar image on your computer and drag it onto the big white space. It will take a little while to upload, then you’ll see a whole bunch of photos with the new calendar selected.
5. Click “Add File”:

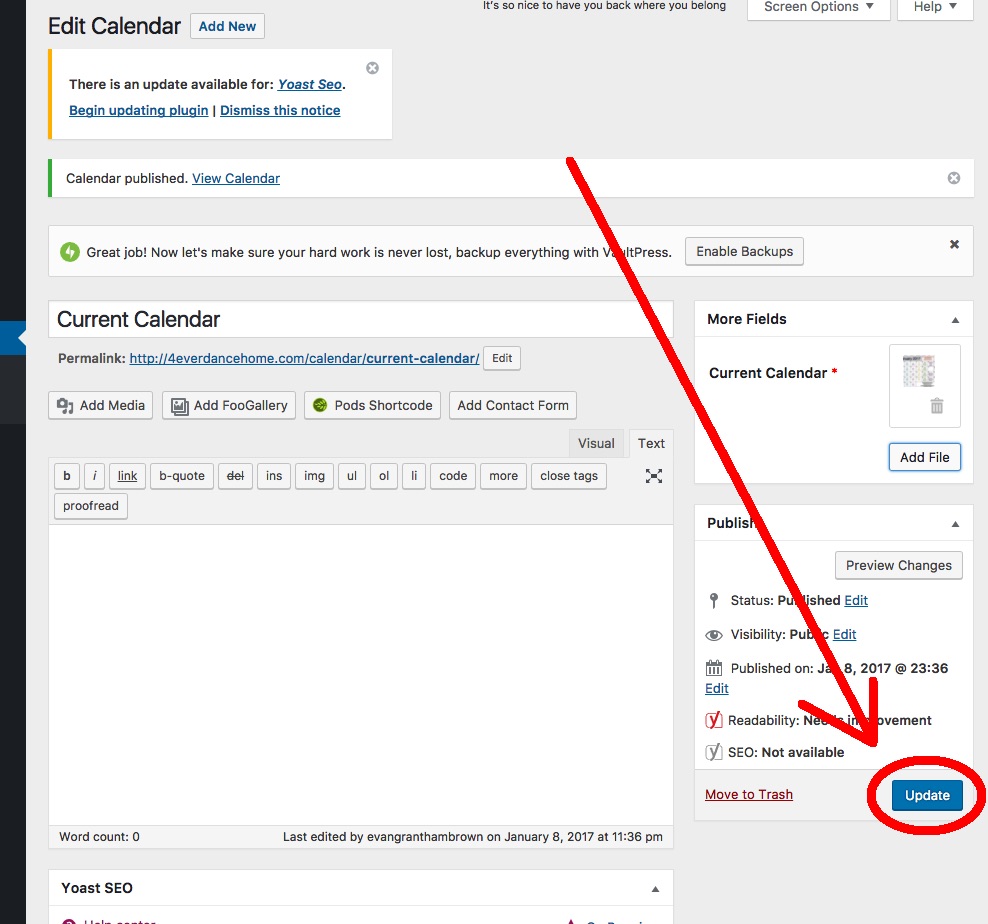
6. When finished, click “Update” to save your changes:
7. Make sure the calendar page looks the way you want it: Calendar Page
Add/Edit Staff Bios
1. Click on this link: Edit Staff Bios
2. To edit an existing bio, hover your mouse over the name and click “Edit” when it appears. To create a new bio, click on the “Add New” button at the top:

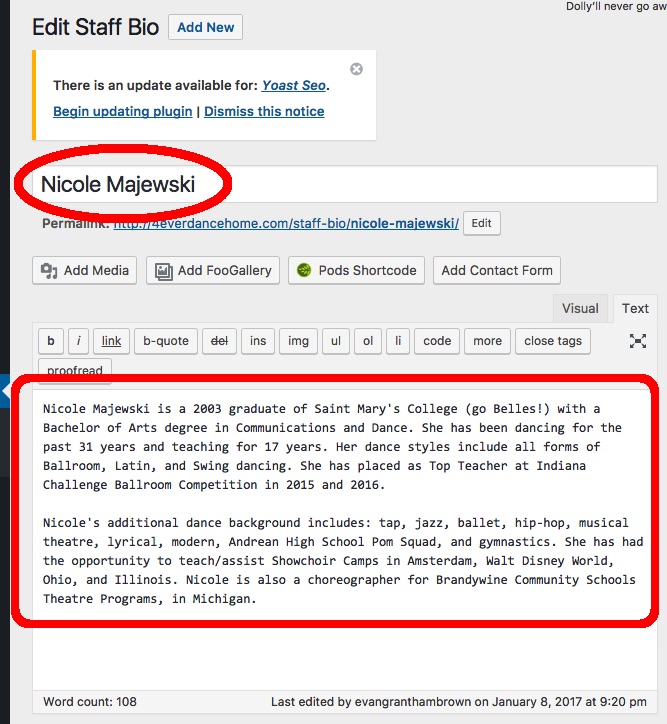
3. The name goes in the box at the top and the bio in the larger field underneath:
4. To add a new portrait photo, click on “Add File” under “Portrait Photo”:

5. If you don’t see a big white space, click “Upload Files:”
6. A big white space with the text “Drop files anywhere to upload” appears:
Find the image on your computer and drag it onto the big white space. It will take a little while to upload, then you’ll see a whole bunch of photos with your new one selected.
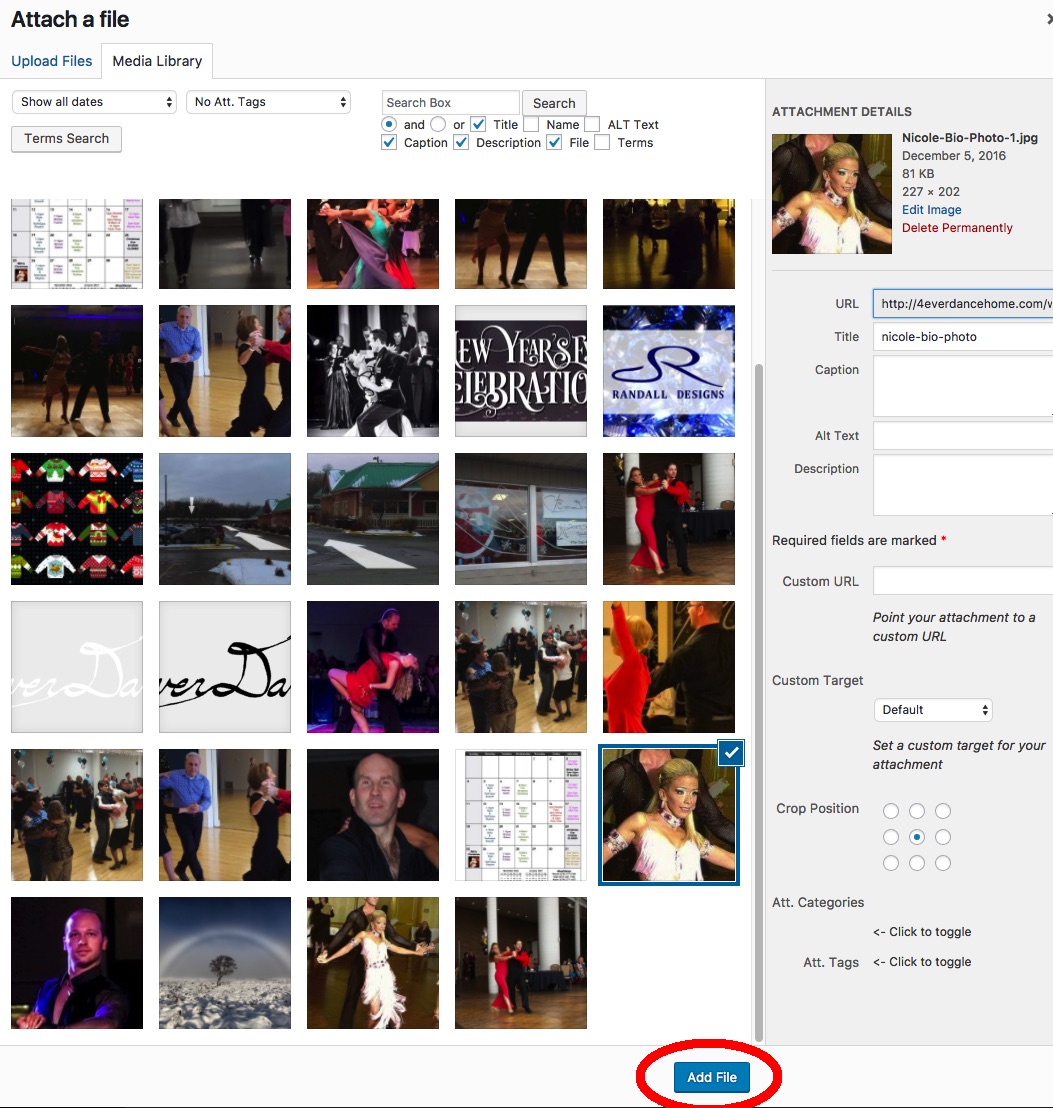
7. Click “Add File”:
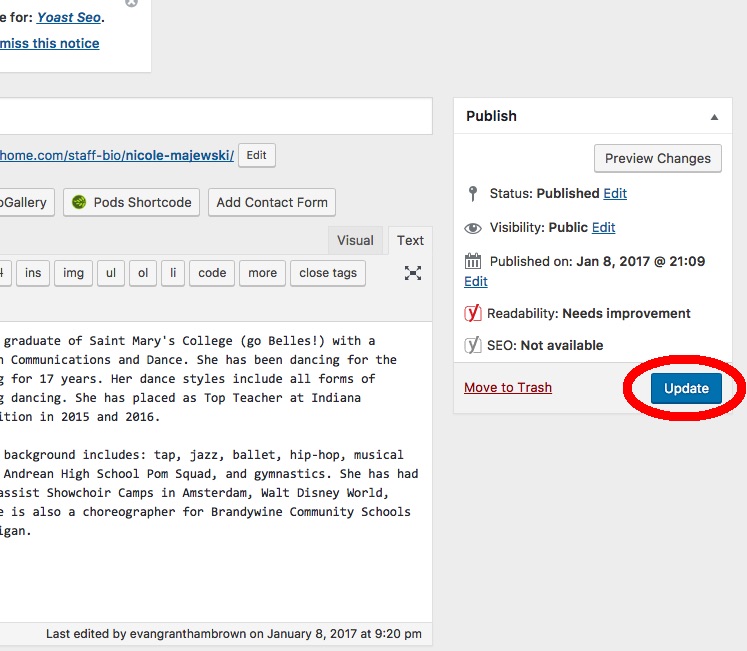
8. When finished, click “Publish” or “Update” to save your changes:
9. Make sure the studio info page looks the way you want it: Studio Info Page
Change Studio Hours
1. Click on this link: Change Studio Hours
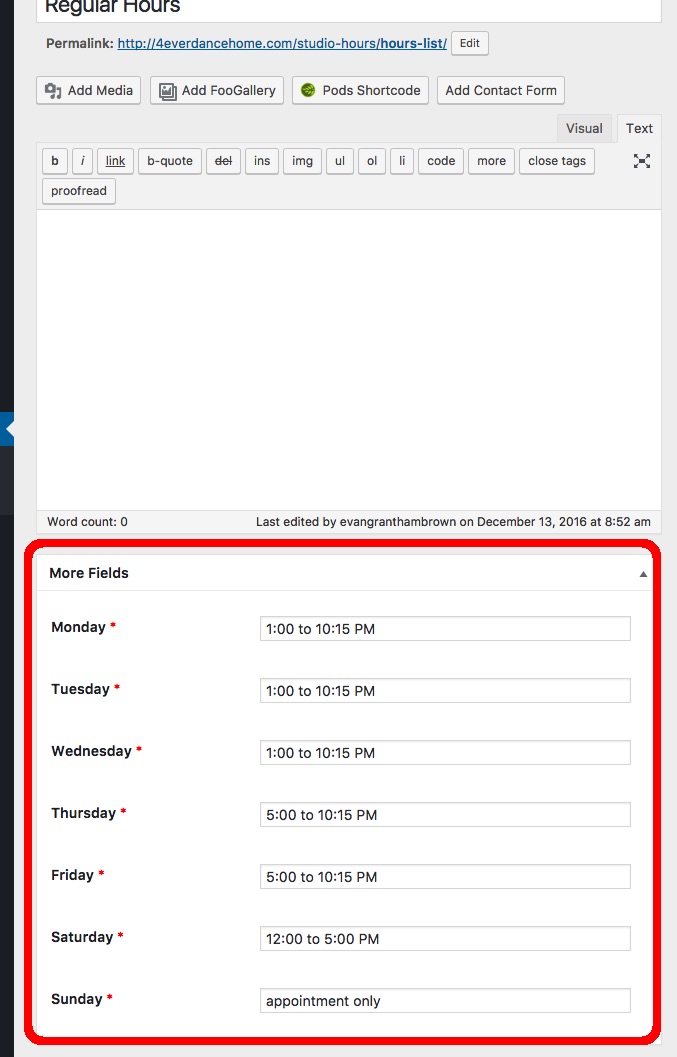
2. Enter the new hours in the fields below:
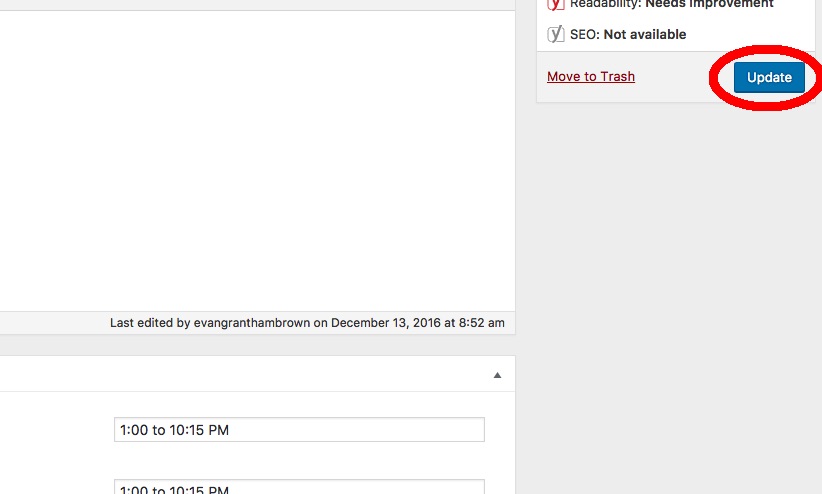
3. When finished, click “Update” to save your changes:
4. Make sure the studio info page looks the way you want it: Studio Info Page
Add/Edit Scheduled Classes
1. Click on this link: Edit Scheduled Classes
2. To edit an existing class, hover your mouse over the name and click “Edit” when it appears. To create a new class, click on the “Add New” button at the top:

3. The class name goes in the box at the top and the description in the larger field underneath. Also include start and end times, cost, and day of week:
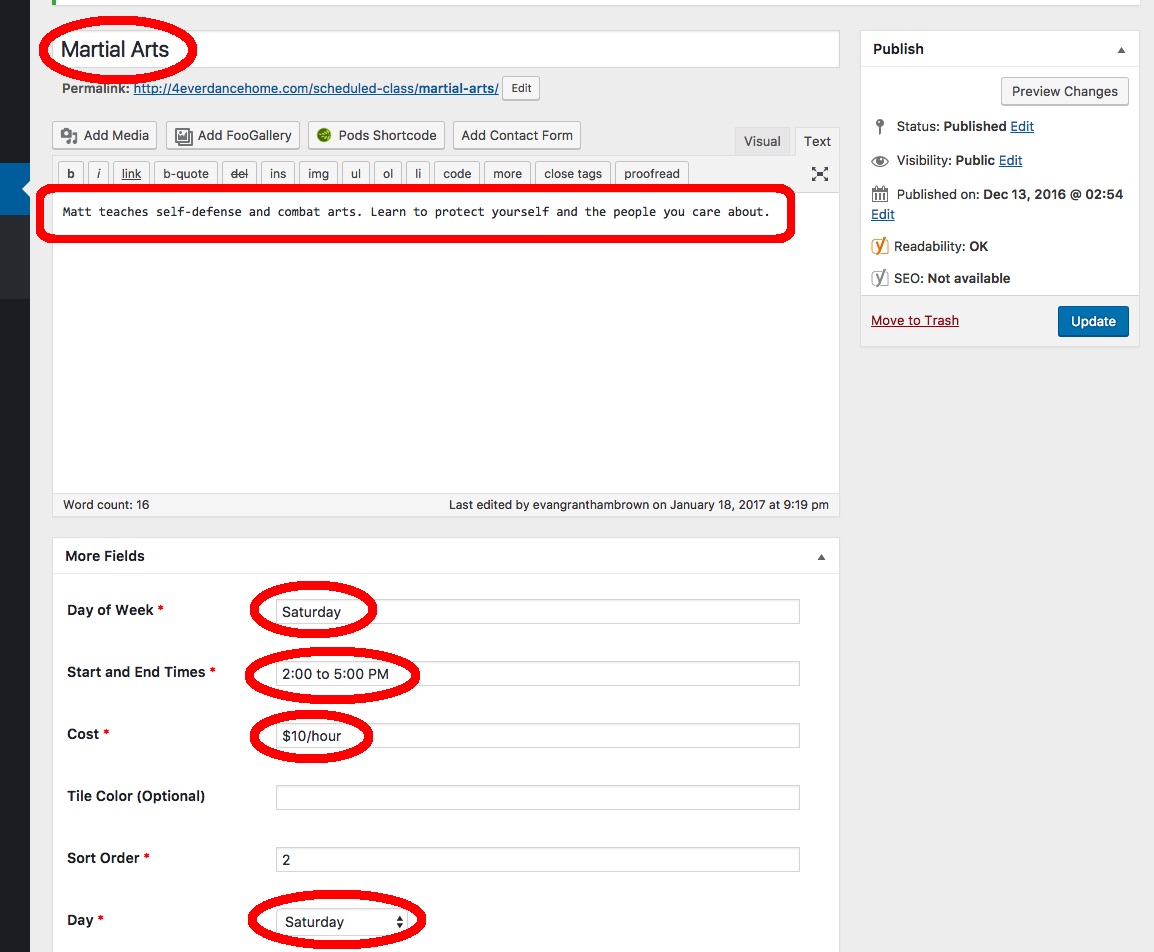
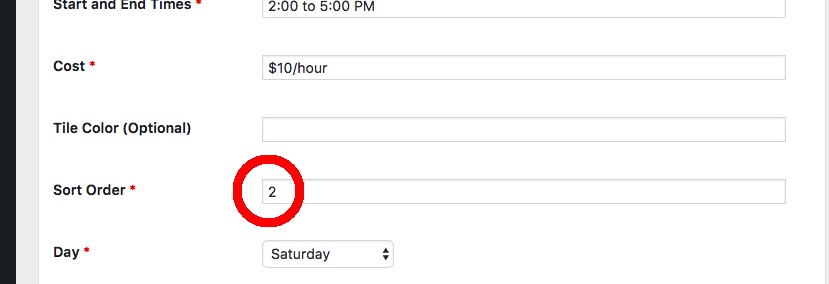
4. Set the sort order. If this is the only class on that day, it should be 1. If there are other classes on the same day, the first class of the day should be 1, the second class of the day should be 2, and so on. This sets the order they’re listed on the page. Example: If Adult Tap and Martial Arts are both Saturday classes, and you want Adult Tap listed first, Adult Tap should be 1 and Martial Arts should be 2.
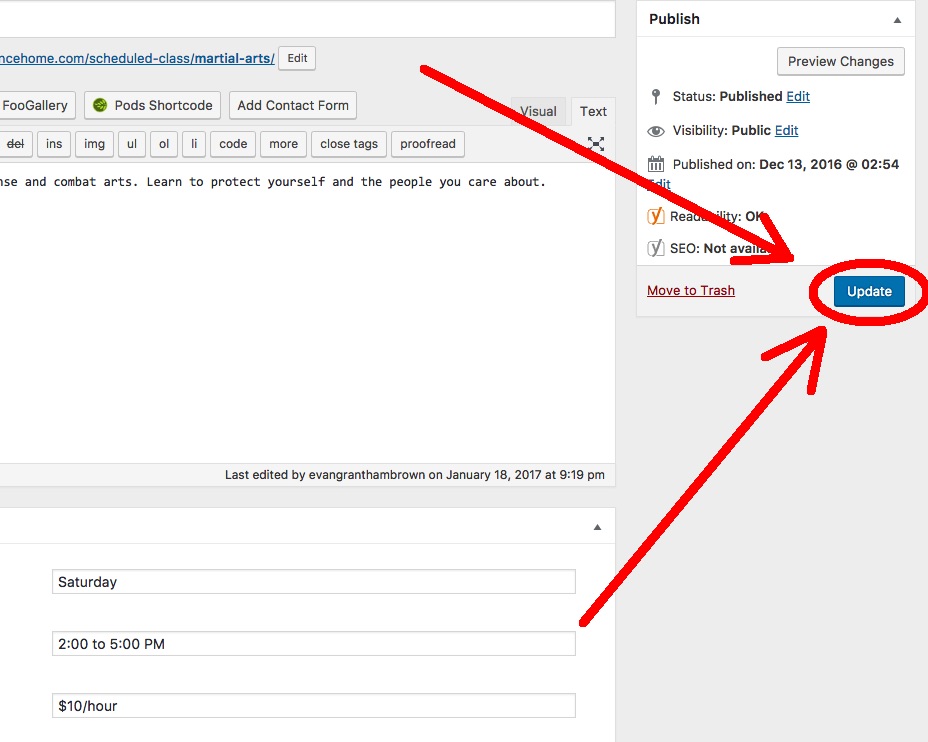
5. When finished, click “Publish” or “Update” to save your changes:
6. Make sure the classes page looks the way you want it: Classes Page
Add/Edit Events
1. Click on this link: Edit Events
2. To edit an existing event, hover your mouse over the name and click “Edit” when it appears. To create a new event, click on the “Add Event” button at the top:
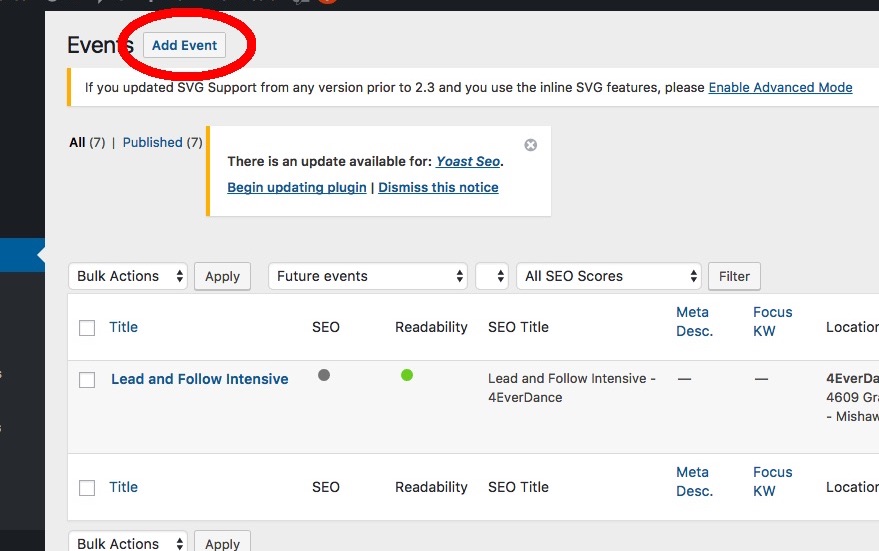
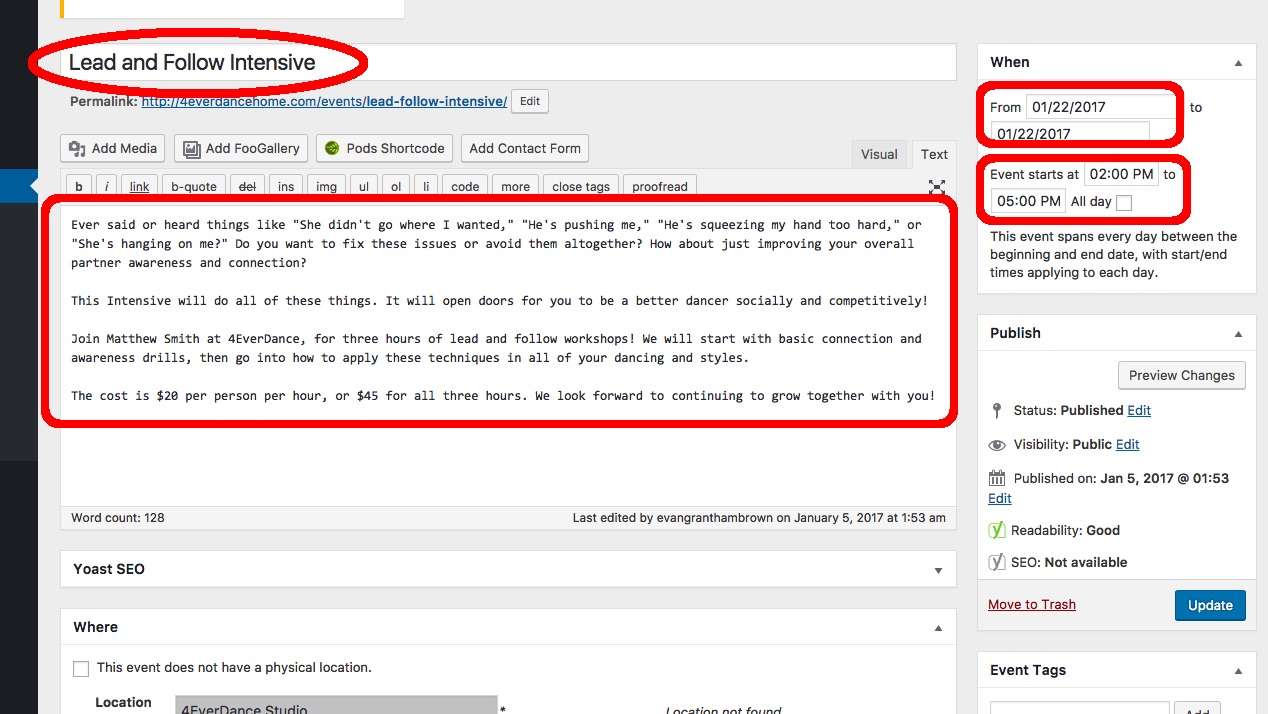
3. The event name goes in the box at the top and the description in the larger field underneath. Also include start and end dates and times:
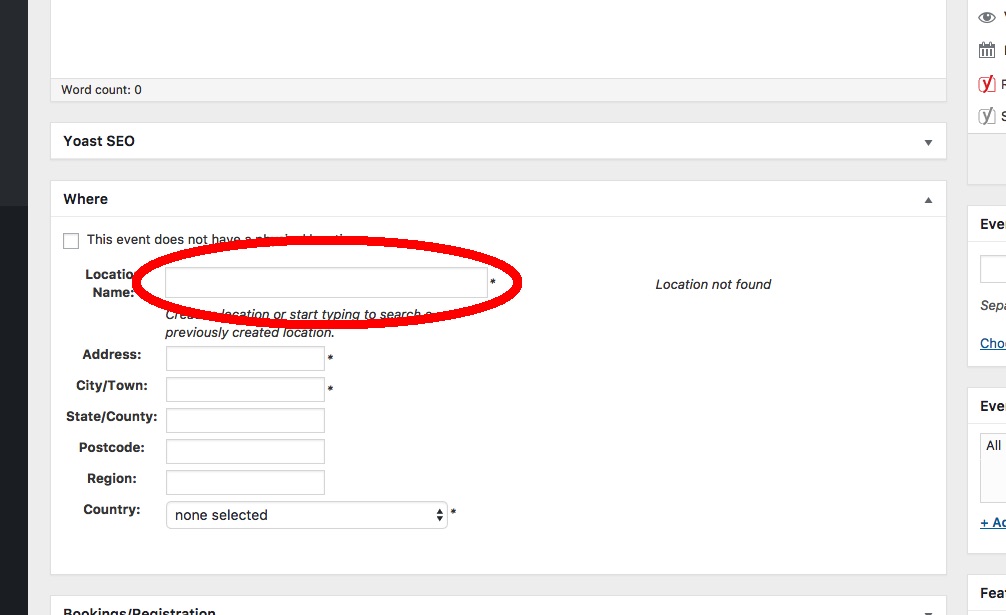
4. Set the location. Start typing in the “Location” box and select from the menu when it comes up. (If the event takes place at a location not in the menu, you can add new ones here. If you need to change locations, click on “Reset this form to create a location or search again.”)
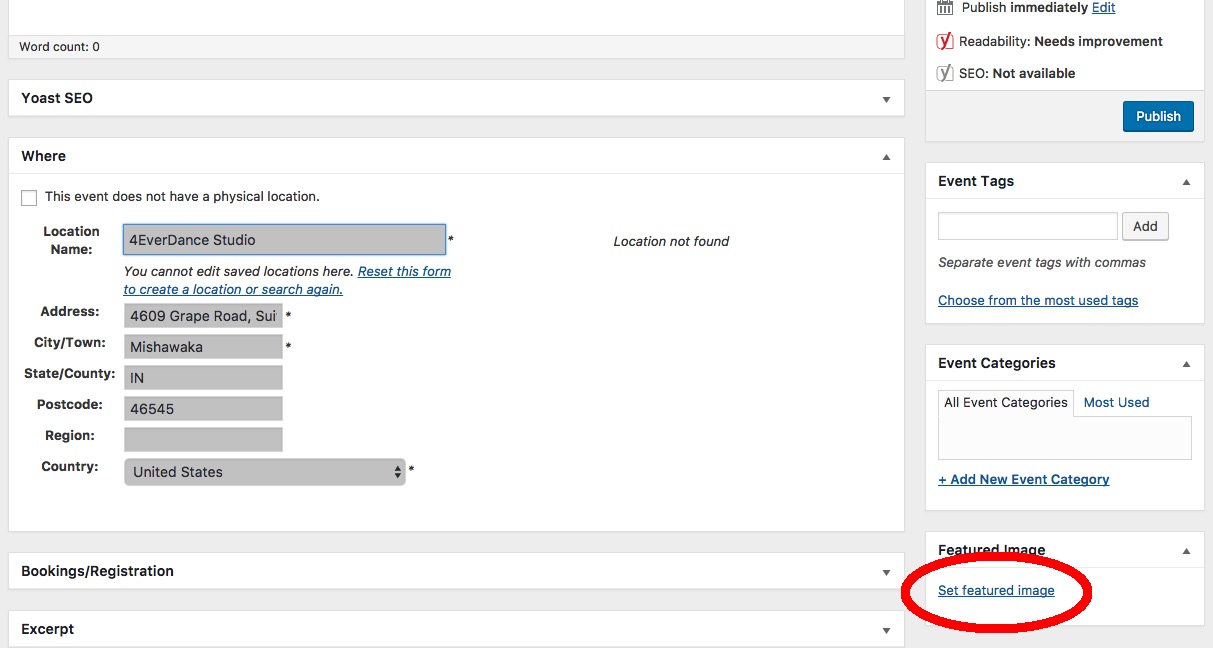
5. To set the event image, click on “Set featured image:”
6. If you don’t see a big white space, click “Upload Files:”
7. A big white space with the text “Drop files anywhere to upload” appears:
Find the image on your computer and drag it onto the big white space. It will take a little while to upload, then you’ll see a whole bunch of photos with your new one selected.
8. Click “Add File”:
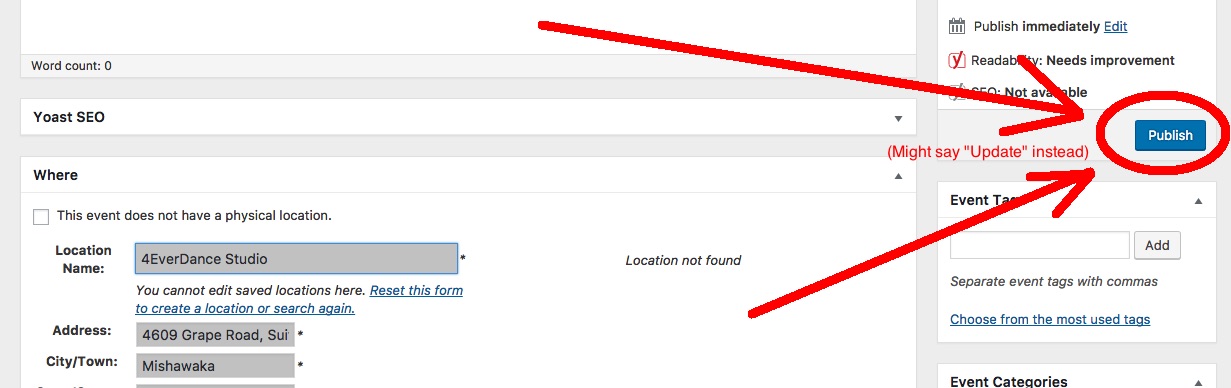
9. When finished, click “Publish” or “Update” to save your changes:
10. Make sure the calendar page looks the way you want it: Calendar Page
Add/Edit Gallery Photos
1. Click on this link: Edit Galleries
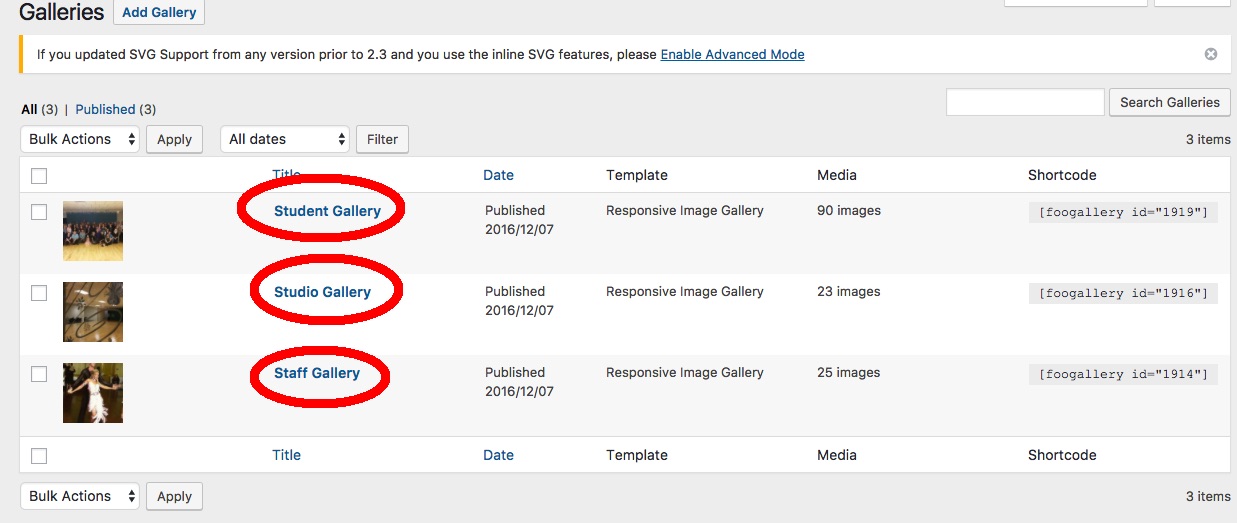
2. Click on the name of the gallery you want to edit:
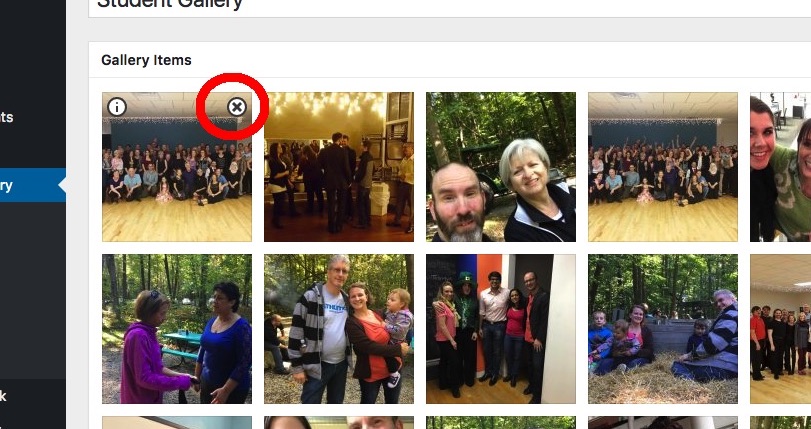
3. To change the order of images, drag them around. To delete an image, hover your mouse over it, then click the X in the top right:
4. To add an image, scroll to the bottom and click “Add Media:”

5. If you don’t see a big white space, click “Upload Files:”
6. A big white space with the text “Drop files anywhere to upload” appears:
Find the images on your computer and drag them onto the big white space. It will take a little while to upload, then you’ll see a whole bunch of photos with the new ones selected.
7. Click “Add Media”:

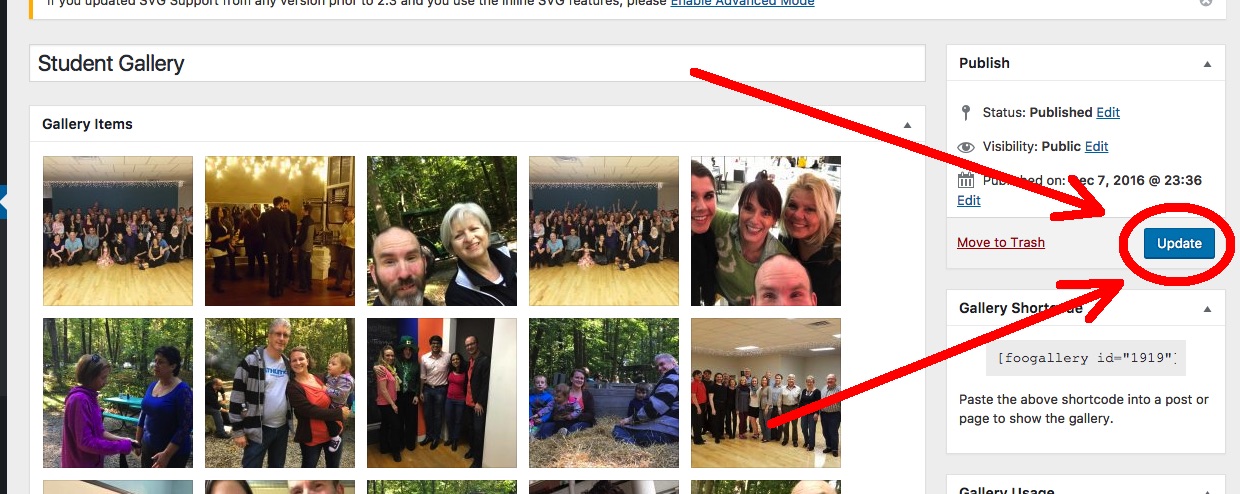
8. When finished, scroll back to the top and click “Update” to save your changes:
9. Go to the Studio Info page, select the gallery, and make sure it looks the way you want it: Studio Info Page